CentOS7 FTP(vsftpd) 서버 설치 및 접속하기
- IT
- 2020. 10. 6.
1단계. vsftpd 설치
ftp 서버(vsftpd) 설치
yum install vsftpd -y
설치 확인
[root@ftp01 ~]# rpm -qa | grep vsftpd
vsftpd-3.0.2-27.el7.x86_64
2단계. vsftpd 설정 파일 확인 및 수정
설정 파일 위치
[root@ftp01 vsftpd]# pwd
/etc/vsftpd
[root@ftp01 vsftpd]# ll
합계 20
-rw------- 1 root root  125  4월  1  2020 ftpusers
-rw------- 1 root root  361  4월  1  2020 user_list
-rw------- 1 root root 5116  4월  1  2020 vsftpd.conf
-rwxr--r-- 1 root root  338  4월  1  2020 vsftpd_conf_migrate.sh
vsftpd.conf 파일의 내용입니다. 디폴트 상태에서 일부 내용은 수정하였습니다.
anonymous_enable=YES           # anonymous(익명) 사용자의 접속 허용여부
local_enable=YES               # 서버 일반 계정으로 ftp 접속 허용여부
write_enable=YES               # 쓰기권한 허용여부
local_umask=022                # umask 디폴트값 022
dirmessage_enable=YES          # 사용자가 특정 디렉토리로 이동하였을 때 디렉토리의 메시지를 보여줄지 여부
xferlog_enable=YES             # 로그를 남길것이지 여부
connect_from_port_20=YES       # 20번 포트의 데이터전송 연결을 허용여부
xferlog_file=/var/log/xferlog  # 로그 저장 경로
xferlog_std_format=YES         # xferlog 표준형식으로 로그를 남길것인지에 대한 설정
idle_session_timeout=600       # 클라이언트에서 아무 작업이 없을 때 해당 시간 후에 세션이 끊김
data_connection_timeout=120    # 데이터 전송시 타임아웃
chroot_local_user=NO           # 홈디렉토리를 벗어나지 못하게 하는 설정
chroot_list_enable=NO          # 홈디렉토리를 벗어날수있는 list 설정 여부
listen=NO                      # standalone 모드로 운영할것이면 yes
listen_ipv6=YES                #
pam_service_name=vsftpd        # pam service name 지정
userlist_enable=YES            # userlist 사용 여부
tcp_wrappers=YES               # 접근제어 사용 여부
이번엔 설정 파일 위치에 있는 ftpusers, user_list 파일에 대해 좀 알아보겠습니다.
두 파일은 모두 ftp 접속하는 사용자를 제한하는 설정 파일로 서로 연관은 없습니다.
ftpusers : 해당 파일 내 계정은 접근을 할 수 없다고 보시면 됩니다.
user_list : 해당 파일은 설정에 따라 동작 방식이 조금 다릅니다.
▶ userlist_enable=YES이라는 전체 하에,
▶ userlist_deny=NO 설정일 경우, user_list 내 계정은 접근 가능
▶ userlist_deny=YES 설정일 경우, user_list 내 계정은 접근 불가
3단계. vsftpd 데몬 구동 및 부팅 시 자동 구동 설정
vsftpd 부팅 시 자동 구동 설정
systemctl enable vsftpd.service
부팅 시 자동 구동 설정 확인
[root@ftp01 tmp]# systemctl is-enabled vsftpd.service
enabled
vsftpd 데몬 start, stop, restart
systemctl start vsftpd
systemctl stop vsftpd
systemctl restart vsftpd
vsftpd 데몬 상태 확인
[root@ftp01 tmp]# systemctl status vsftpd
● vsftpd.service - Vsftpd ftp daemon
   Loaded: loaded (/usr/lib/systemd/system/vsftpd.service; enabled; vendor preset: disabled)
   Active: active (running) since 화 2020-10-06 18:53:17 KST; 3s ago
  Process: 1986 ExecStart=/usr/sbin/vsftpd /etc/vsftpd/vsftpd.conf (code=exited, status=0/SUCCESS)
 Main PID: 1987 (vsftpd)
   CGroup: /system.slice/vsftpd.service
           └─1987 /usr/sbin/vsftpd /etc/vsftpd/vsftpd.conf

10월 06 18:53:17 ftp01 systemd[1]: Starting Vsftpd ftp daemon...
10월 06 18:53:17 ftp01 systemd[1]: Started Vsftpd ftp daemon.
Listen 포트 확인
[root@ftp01 tmp]# netstat -lntup | grep ftp
tcp6       0      0 :::21                   :::*                    LISTEN      1987/vsftpd
3단계. ftp 접속 테스트(from. local)
접속 테스트를 위해 테스트 계정을 생성하고 패스워드를 설정합니다.
useradd test_user_1
passwd test_user_1
로컬 서버에서 접속 테스트를 해보겠습니다.
명령어는 "ftp"입니다. 설치가 안되신 분들은 "yum install ftp"로 설치를 진행해주세요
정상적으로 서버 접속이 되었습니다.
현재 위치는 계정의 홈 디렉터리입니다.
ftp> pwd
257 "/home/test_user_1"
상위 디렉터리로 이동을 해서 "ls"를 입력하면 전체 계정이 확인이 됩니다.
다른 계정에 접근이 가능하다니 보안상 안 좋겠죠? 이 부분을 막아보도록 하겠습니다.
ftp> cd ..
250 Directory successfully changed.
ftp> ls -al
229 Entering Extended Passive Mode (|||60328|).
150 Here comes the directory listing.
drwxr-xr-x    9 0        0             126 Oct 06 09:58 .
dr-xr-xr-x   17 0        0             244 May 23 07:28 ..
drwx------    2 1000     1000           62 May 23 06:32 nagios
drwx------    2 1001     1002           62 Oct 06 09:58 test_user_1
drwx------    2 1002     1003           62 Oct 06 09:58 test_user_2
drwx------    2 1003     1004           62 Oct 06 09:58 test_user_3
drwx------    2 1004     1005           62 Oct 06 09:58 test_user_4
drwx------    2 1005     1006           62 Oct 06 09:58 test_user_5
drwxr-xr-x    4 0        0              32 May 29 12:38 www
226 Directory send OK.
vsftpd.conf 파일에서 아래 설정 부분을 YES로 변경합니다.
그리고 다시 한번 재구동을 합니다.
chroot_local_user=YES
음... 접근 자체가 안되네요.
[root@ftp01 tmp]# ftp localhost
Trying ::1...
Connected to localhost (::1).
220 (vsFTPd 3.0.2)
Name (localhost:root): test_user_1
331 Please specify the password.
Password:
500 OOPS: vsftpd: refusing to run with writable root inside chroot()
Login failed.
421 Service not available, remote server has closed connection
원인은 chroot 설정이 된 디렉터리에는 wirte권한이 없는데 실제 디렉터리에는 wirte 권한이 있어서 충돌이 발생한 것인데요
방법은 두 가지입니다.
- test_user_1 계정의 홈 디렉터리의 wirte 권한을 빼던지
dr-x------ 2 test_user_1 test_user_1 62 10월 6 18:58 test_user_1
- 아니면, vfstpd.conf 파일 chroot write 권한을 주는 것입니다.
allow_writeable_chroot=YES
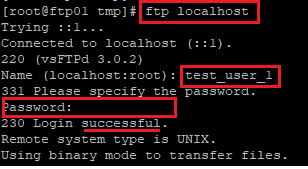
두 번째 방법으로 진행 후 다시 접속해 보겠습니다.
접속 후에 현재 위치를 확인해 보시면 이전과 다르게 "/"입니다.
상위로 이동을 해도 현재 위치 그대로입니다.
[root@ftp01 home]# ftp localhost
Trying ::1...
Connected to localhost (::1).
220 (vsFTPd 3.0.2)
Name (localhost:root): test_user_1
331 Please specify the password.
Password:
230 Login successful.
Remote system type is UNIX.
Using binary mode to transfer files.
ftp> pwd
257 "/"
ftp> cd ..
250 Directory successfully changed.
ftp> pwd
257 "/"
4단계. ftp 접속 테스트(from. 파일 질라)
이번엔 외부 클라이언트 파일 질라를 이용해서 접속해 보겠습니다.
아래 이미지와 같이 설정해 주시고 접속합니다.
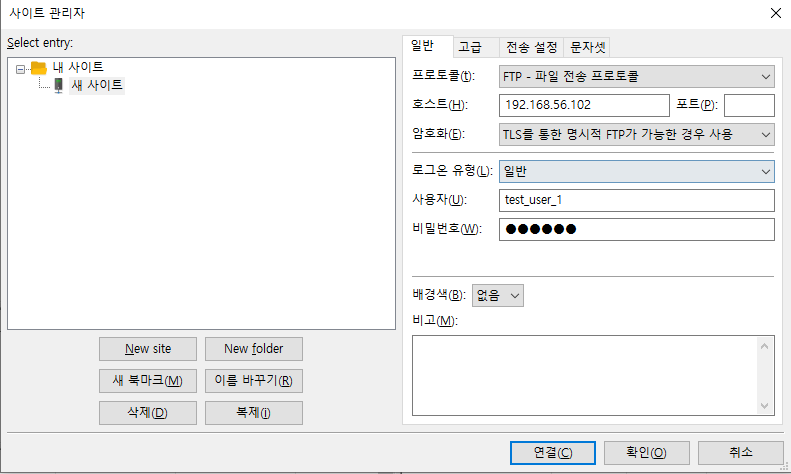
정상적으로 접근이 되었습니다.

테스트로 test.html 파일을 하나 생성해보았고요.
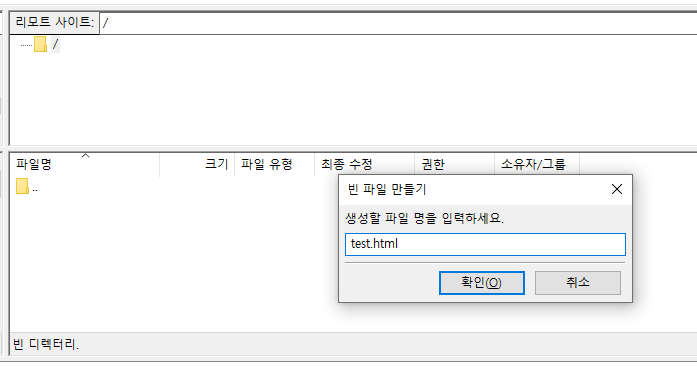
서버에서 확인하였습니다.
[root@ftp01 home]# cd /home/test_user_1
[root@ftp01 test_user_1]# ls
test.html

5단계. user_list 테스트
이번엔 2단계에서 말씀드린 "user_list"에 대해 테스트를 진행해보겠니다.
현재 설정은 userlist_enable=YES이며, userlist_deny 설정은 안되어있습니다.
즉, 디폴트는 "YES"입니다. 그래서 test_user_1 이 접속이 된 것이죠
그럼 user_list에 test_user_1을 추가하고 접근 테스트를 진행해 보겠습니다.
root@ftp01 test_user_1]# cat  /etc/vsftpd/user_list | grep -v ^#
bin
daemon
adm
lp
sync
shutdown
halt
mail
news
uucp
operator
games
nobody
test_user_1
530 Permission denied가 뜨고 접근이 안되네요. 참고로 vsftp는 재구동을 안 했습니다.
[root@ftp01 test_user_1]# ftp localhost
Trying ::1...
Connected to localhost (::1).
220 (vsFTPd 3.0.2)
Name (localhost:root): test_user_1
530 Permission denied.
Login failed.
user_list : 해당 파일은 설정에 따라 동작 방식이 조금 다릅니다.
▶ userlist_enable=YES이라는 전체 하에,
▶ userlist_deny=NO 설정일 경우, user_list 내 계정은 접근 가능
▶ userlist_deny=YES 설정일 경우, user_list 내 계정은 접근 불가
'IT' 카테고리의 다른 글
| [Linux] 디스크 추가 후 리부팅 없이 인식시키기 (0) | 2020.10.09 |
|---|---|
| CentOS7 SFTP 설치 및 접속하기 (0) | 2020.10.07 |
| [WAS] apache tomcat 연동(Feat. mod_proxy_ajp) (0) | 2020.09.29 |
| [Linux] nc 명령어 (0) | 2020.09.28 |
| [Linux] rsync를 이용한 데이터 (증분)백업 script (0) | 2020.09.24 |
